When it comes to coding a website so that it would change based on a particular user or particular page requires a lot of skills. However, with the help of useful WordPress extensions, you can do it without any coding background at all. In this article, you will learn how to create a dynamic menu in WordPress and how to use it.
When should you use different menus for different pages?
If you have a website which allows the visitors to sign up and log in, it makes perfect sense to display a different menu to registered users and another menu to those who aren’t. A registered user doesn’t need to see the “Sign-up” button and vice-versa. Similarly, it doesn’t make sense to display a link for editing user profile to someone who doesn’t even have one.
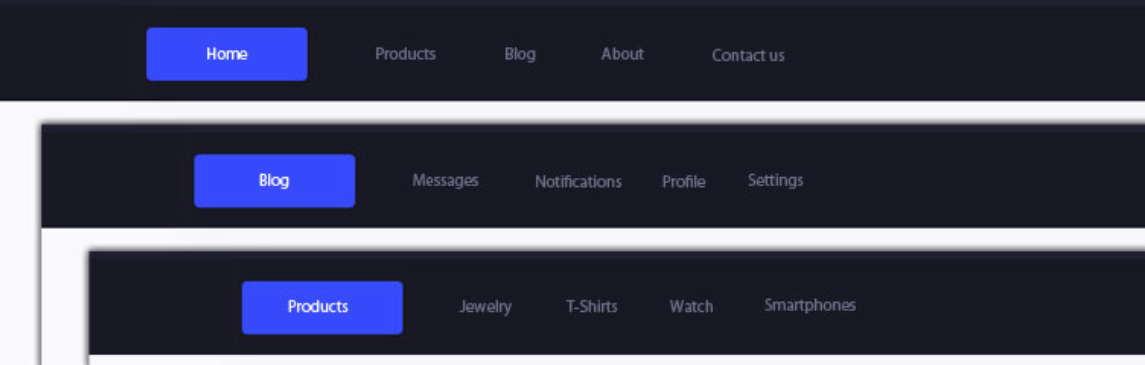
Showing different menus for different pages can also be of great use. This allows you to navigate the visitor to the relevant page, find the right solution to their problem, or complete a transaction.
How do I display different menus on different pages and in different situations in WordPress?
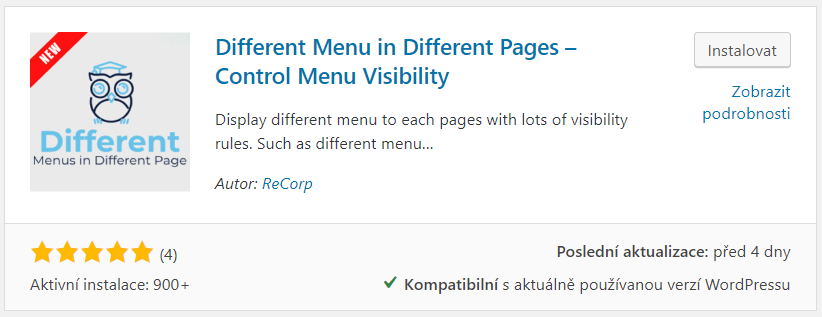
Different Menu in Different Pages – Control Menu Visibility is a free and extremely useful WordPress extension which takes menu-editing to a whole new level. With this plug-in, you can easily create rules for displaying different menus for particular pages, URL, categories or even users.
How to install the extension:
- In the WordPress dashboard, click on “Plug-ins” in the left sidebar and then “Add new”.
- Write “Different Menu in Different Pages” in the search box.
- Click on “Install”.
- After the installation, click on “Activate” to activate the plug-in.
- Then go to “Settings” > “Different Menus”.
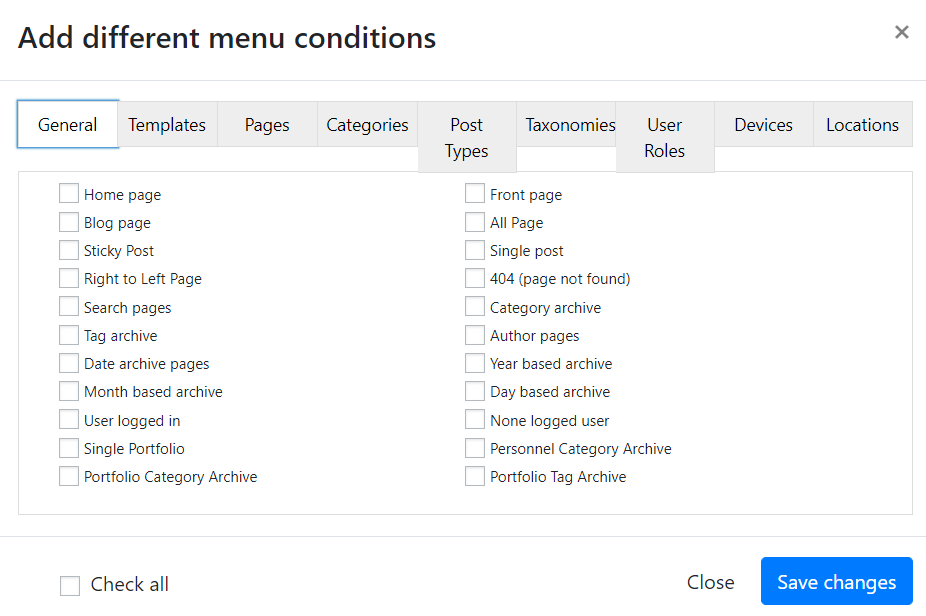
When you open the settings, you will see a simple page where you can choose which Menu is going to be displayed in a particular situation by clicking on “Add Different Menu” and “Setup”. You can combine the conditions or set different conditions for particular web pages, categories, posts, tags, user roles and to register/unregister users.
This plug-in also allows setting different menus based on the user’s location or based on their device, depending on the platform. However, if you want to use these particular functionalities, you will have to pay for them.
How do I create a menu?
In order to set different menus for different pages, you first have to know how to create one. You can do it directly in the WordPress interface, by going to “Appearance” > “Menu”. You can then create completely new menus or, to save time, copy menus by clicking on “Duplicate Menus” and then simply adjust specific items in the menu.
This plug-in works perfectly for its intended purpose and you can create complex menu structures with it. Even the free version offers functionalities that sometimes surpass those of many other paid plug-ins.